...anyone can start today and make a new ending.

December 31, 2011

"Nobody can go back and start a new beginning, but anyone can start today and make a new ending."
Maria Robinson

New day, new year, new start!

I have never been big on the whole New Year's resolutions thing.  I cannot recall having ever come up with a real resolution.  I think I usually just say something silly and go about my business.

This year - I am taking this seriously!

I assigned each family member {except Ella, she still won't talk!} the task of coming up with 5 goals for 2012.

Many people work really hard at their resolutions for about a month and then toss them aside and go back to their old ways.  This is not as easy to do if you broadcast your goals in some manner.  So to keep us honest I created this goal display.


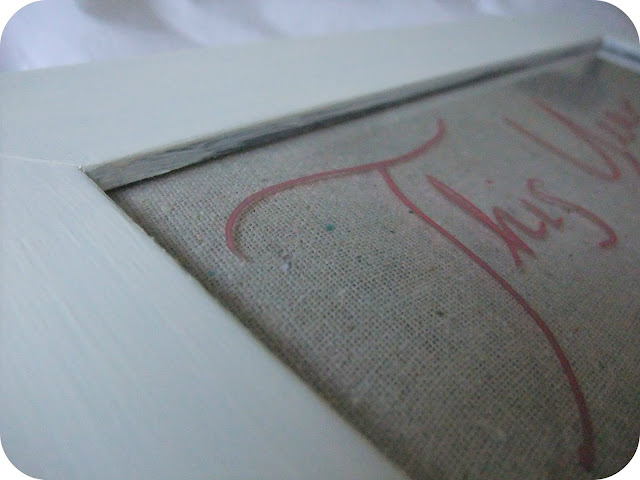
Step 1.  I scrounged up an old frame in the basement and gave it 3 coats of acrylic, white paint.

Step 2.  I cut a scrap of fabric and covered the cardboard backing of the frame with it.  I used glue dots around the back of the cardboard to secure the fabric.

Step 3.  I wrote our goals with Maia's window markers.

Step 4.  I took a nap... yawn.

This isn't a game.  There are no rules, no prize.  I simply want my family to take a moment to examine our lives and come up with some ideas on how to move forward in a positive way that best suits each of us.

Here is how we are moving forward:

Daddy - Lose 3% body fat, read 6 books, take one business class per quarter, lead a one-day sport's camp, improve upon our fruit/veggie garden setup

Mommy - Workout 3 times per week, open an Etsy shop, acquire 200 blog followers {hint hint}, design my craft room and complete it, improve upon our flower garden

Maia - Learn to tie her own shoes, ride her bike without training wheels, swim without a lifejacket, clean her room everyday, complete her morning and bedtime skincare routine on her own {she gets "itchies" (psoriasis = lame) so the routine involves oil and vaseline application - she hates it!}. 

Counting Down with Family Fun!

Some of you observant types might have noticed that I kind of *cough* disappeared the week before Christmas.  I was in over my head with projects and I caught a nasty cold and I was just miserable in general.  So I set the blog aside and gave up on my remaining Christmas decor plans and went straight to finishing Christmas gifts {I will share those another time - they were AWESOME}.  I have come up with some blog planning strategies that I believe will better prepare me for the 2012 blogging season.  But, enough of my excuses...

2011 was the first year that our family had an advent calendar which contained daily activities {see the project here}.  With all of the parties, decorating, crafting of gifts, baking, school activities, etc. {I know this isn't just our household}, I was a bit uncertain about being able to keep up with the advent day-to-day fun.  

Surprisingly, we did it!  

Each day's activity gave us the opportunity to take a break from the holiday madness and enjoy some time together.  It felt good taking some time from the constant go, go, go to sit down with Maia and watch a Christmas movie or help her with a holiday craft or go shopping to let her pick out gifts for Daddy and Sister or having a hot cocoa and popcorn party, etc.  

Sometimes amongst the day-to-day craze we live in, we forget to stop.  We think we don't have the time, but after seeing how well we did this month, I can see that I really do have the time.  Planning it all out and assigning an activity each day allowed me to mentally prepare and it eliminated the need for Maia to whine about not having something to do.  Maia knew what family fun to expect and Mommy was able to organize her day with the activity in mind.

So here is what I have decided to do:  I am going to do this every month!  Each month I will create a new {super creative and freakin' adorable} countdown and each day will be assigned an activity.  Maia will be better able to remember the date each day, we will look forward to a family activity and Maia will hopefully learn something from each activity {even if it is just enhancing her crafting skills - I am grooming her to be bigger than Martha Stewart}.

I think this is going to be PHENOMENAL!  I am super excited about it {if I hadn't conveyed that already}!

Ok, ok, ok... enough chatter.  Time to put my creativity where my mouth is.  JANUARY HERE WE COME!

I had a few helpers...


January Garland How To:

Step 1.  {I must have been a VERY good girl this year, because Santa brought me the Silhouette Cameo that I had been wishing for}!
I used my fancy new miracle machine to cut out all of the cardstock components of my garland - the people, the hearts and the sweet little envelopes {look at those adorable itty bitty hearts!}.

Step 2.  After the Cameo did it's job, Maia, Ariana {my niece} and I painted each of the little people to signify how different each person in the world is {the girls LOVED this}.

Step 3.  I glued on each itty bitty heart to show that despite how different we may look, we all have the same heart inside {tear}.

Step 4.  I then attached each completed person onto a strand of twine using miniature clothespins {from Joann's - left over from a Christmas gift project}.

Step 5.  I wrote the number of each day onto each envelope using Sharpies.

Step 6.  I glued the cutest envelopes ever onto the pretty peoples using glue dots {love those}.

Step 7.  I printed out the activities on regular printer paper.

Step 8.  I cut out activities with a circle punch and stuffed them into the envelopes.

Step 9.  I smiled.


What does this garland have to do with the month of January?

January holds a holiday which I believe to be very under-appreciated, but so important.  Martin Luther King, Jr is one of the most inspiring people of all time.  His message was, and continues to be, so strong, so inspiring and so important.  Just thinking about it brings tears to my eyes.

For the month of January I want to show my littles more about togetherness and equality.  

I am testing something out this month; I am going to focus my projects around a central theme.  This month's theme will be "I Have a Dream."  All of my posts will not focus on MLK's message, but the majority will.

I have my schedule all mapped out and boy am I excited about what we have in store in the coming month!

We Wreath You a Merry Christmas - Part 3 - Snowball Fight!

December 14, 2011

How could I NOT make a snowball wreath?

I went with a snow theme with the mantel and our outdoor decor this year {we typically don't get much in the way of real snow in these parts} and I am in love with the snowball wreaths I saw while snooping around pinterest.  Kristi from Addicted 2 Decorating has a great tutorial HERE {I can't take my eyes off of her chevron fabric}.

Like many of my projects, this turned out to be pretty time consuming {I'm not really sure why I ever expect it to be anything but}, but completely worth it!


Definitely love the way this flows with my snowflake wonderland outside so I swapped out my beaded masterpiece for this one on the front entry.


I had planned on embellishing it with "Let it Snow" written in red wire, but as I was hanging it on the door the flower arrangement on our entry table caught my eye.  Just for giggles I stuck a few flowers in there and LOVED it, but I needed something else...

Snatched a mini snowman ornament off of the tree {from out of this year's advent calendar HERE}, glued a toothpick to the back and pinned her in.

Perfection.

I will be sharing one more wreath this week, our super simple stockings and show off our finished mantel {I am looking forward to January when I can get back to your everyday crafting!}.

Linking up:

Oh The Places I'll Go {If I Have This Stuff} - My Christmas Wish List

December 13, 2011

As a mom it is so hard to sit down and come up with a Christmas list for YOURSELF.  I've been asked a few times what I would like for Christmas and I get stumped.  This is lame for both me and those who want to find me a gift that I truly want.  So tonight I am sitting down and searching high and low for some items that make my heart sing "GIMME!"

LoveandKnit - Hand Knit Hooded Poncho.  HERE.

Little Beige Riding Hood.  I want to be her!  I feel like putting this on and taking a stroll with little Miss Ella {to Grandmother's house we go!}.

LoveandKnit - Neutral Lacey Slouchy Hat.  HERE.

My hatless head just shed a tear.  I crochet hats for my littles, but have yet to make one for myself.  I have no hats... sickening.

Happy Go Licky - Silk Wrap Bracelet.  HERE.

I have mentioned Happy Go Licky before {HERE} and one of these amazing silk wrap bracelets is still on my list.  I want one with a dandelion with the little wishes being blown off and I want it to say "be brilliant" or something like that... that might be too many letters to also have the dandelion.  I think I would choose a grey or other neutral wrap color.

DKNY Be Delicious - Sephora.  HERE.
I am almost out of my D&G perfume and I need a new scent.  I used to wear DKNY Be Delicious at one point and I miss it.  I want it's tasty goodness back!

Silhouette Cameo.  HERE.

Ahhh... the Silhouette Cameo.  I have been hoping and praying for this for months.  I told my darling, handsome, strong husband that I wanted one for Christmas... we shall see.  I would also love some fancy supplies to use with it.

Kitchenaid.  HERE.

I love my Kitchenaid mixer, but I need some fancy attachments to really see what this baby can do!


YingsStudio - Hand Knitted Leg Warmers/Boot Cuffs.  HERE.

YingsStudio - Hand Knitted Leg Warmers/Boot Cuffs.  HERE.
I am loving the look of boot socks/cuffs/leg warmers {whichever title you fancy}.  I would love to have a few pairs.

I also need some new boots.  I could use a grey pair and a pair of flats {a grey pair of boot flats would work...}.  I didn't see any online and haven't been forced into the mall to shop around this holiday {yet} so I haven't spotted any "must haves" recently.  I know they are out there!

MegansMenagerie - The Yorkshire Cowl in Tampa Spice.  HERE.

I work every 3rd Friday, outside in the freezing cold {well it is freezing for us Seattle folks}.  I need some super cute stuff to bundle myself in.

runningjackknits - Cabled Convertible Mittens Pattern.  HERE.

I also need to keep my little fingers warm when I'm out braving the elements.  I like this pattern {for a fellow crafty person who wants to make me a little sumpin' sumpin'}.

Image from Whimsy Daisy.
I would love, love, love any and all craft supplies or gift cards to craft/fabric stores.  I love having oodles and oodles of ribbons, fabric, buttons, paint, stencils, stamps, etc.  I have been slowly adding to my craft arsenal and I get the warm fuzzies when I can create something on a whim using things that I already have.  I would love to keep adding to the stock!

Oh gosh, I bet I could keep going and going and going... but I feel like this is a pretty well rounded gathering of wishes for someone who started out having no idea what to look for.

I hope my gimme list helped you get your own selfish wheels turning.  What do YOU want for Christmas!?

10 Fun & Easy Christmas Wrapping Ideas

December 12, 2011

We Wreath You a Merry Christmas - Part 3 - SNOWBALL FIGHT! has been delayed due to a shortage of supplies {oh no!}.  Supplies have been replenished and as soon as Tiny takes a nap I will work feverishly to finish it so I can post it tomorrow.  Don't fret!

In the meantime, I wanted to share some super cute ideas for wrapping all of your holiday loot.


Martha Stewart rarely disappoints with her ideas {of any kind}.  Love buttons and love baker's twine, so it makes sense that this would be a favorite.  Check it out HERE.


I adore itty bitty bows and Good Housekeeping shared THIS idea.  I have purchased a pack of 9 in gold and silver from the dollar store before, might want to check it out if you like this.


Monogrammed gift wrapping adds a nice personal touch.  This collection of ideas comes from Martha Stewart, Better Homes & Gardens, Martha Stewart {again}, and Good Housekeeping.  I particularly like them because you could probably use things you already have in your stash {no extra trips to the craft store where you will probably find countless other things you want and end up spending $75 when the supplies you went for were $5 - this NEVER happens to me... *nervous cough*}.


Yarn pom poms!  So sweet!  I know you have yarn.  If you don't have kraft paper you could always use tissue paper {who doesn't have a pile of that around?}.  Found this at Art Design Studios HERE.


Simple and wholesome.  A quick knit or crochet away from a homemade "ribbon."  I love this!  I found it HERE at Miss Yellow Shoes, but the link she listed did not lead me to the original work {sad face}.  If you know where this came from let me know!


Yard waste put to good use!  I love when I can use things from my yard to make pretties!  I happen to have a bag of pine cones sitting in my craft closet that we collected to make a Thanksgiving wreath HERE.  Found this idea at Home Klondike HERE.


Love polka dots!  You could easily put a little gold topper on each of these to make them ornaments or use snowflakes instead.  Precious!  Who wouldn't love getting this present?  I found this at Design Sponge HERE.


Another pom pom idea?  Geez.  I have a lot of yarn so I think that is what is drawing me to these.  This one is just a bit different since the pom poms are hanging.  I think it would be super cute to hang a monogram made from wire with the pom poms too.  Eeee!  I am going to use this one!  Found it at Two Shades of Pink HERE.  I LOVE her bunting wrap too!


This final one is my own creation.  We went to Jozie Lou Who's 2nd birthday party yesterday {ADORABLE party theme, by the way} and this was how I wrapped her itty bitty books.  Super simple and these were things I had in stock.  Just a few sheets of tissue paper, some white yarn, a tag shaped hole punch, red cardstock, a white pipe cleaner and a red pipe cleaner.  WA-LA!


Happy wrapping everyone!


We Wreath You a Merry Christmas - Part 2 - Wishing You a Minty Fresh Holiday

December 9, 2011


This wreath will leave you feeling minty fresh!

Super easy {and inexpensive} to make and it is simply adorable.  I have seen several mint wreaths this season on pinterest, but one of my favorites was THIS ONE over at Procraftination Station {cute name too}.  I had completely forgotten that she also used polka dots!  Great minds think alike!

I used 2 bags {plus a few extra from the 3rd bag} of peppermints that I bought at the dollar store.  I already had the 10" styrofoam wreath form and I already had the cutesy polka dot fabric {from my tree skirt HERE}.

I did not take any photos of the process for this one, but like many wreaths, what you see is what you get.  I just glued each mint on, around and around until I covered the form as best I could {the white shows through in most places, but I don't mind because it works fine with the white and red mints}.  I decided at the last minute to add the vertical mints around the outer rim.  If you do something like that make sure to put a nice size glob of hot glue and hold it for a good 30 seconds {I had to re-glue several this morning, but we've got it now!}.


What's coming next on We Wreath You a Merry Christmas?  SNOWBALL FIGHT!

Linking up:

DIY Christmas Canvas Creations

December 8, 2011

Sorry, have to take a quick break from We Wreath You a Merry Christmas to bring you this mantel update.

I have had a hard time sticking to one idea for my mantel this Christmas.  I am still not quite ready to reveal the mantel in it's entirety {since I am making changes every 5 minutes...}.

Here are a couple things I am crazy about so far:

I created these two simple pieces of art for the mantel using things I had stuffed in the ol' craft closet.  I am pretty smiley about these.


I hung this year's Christmas  photo card on the aqua piece.  Do you not love it?  So excited to send them out next week!


Check out all that texture!  

I dry brushed some teal acrylic paint on the canvas, followed it immediately with a light dusting of white sand from the dollar store for a snowy effect and to finish it off I gave it a good - awww!  The silver clip is from a pack of 6 that I found at Ross.  I have been using them to display Maia's art on the walls.  Keep an eye out for a post on that...


There's that other reindeer's buddy - I used his partner on my beady wreath HERE.  Loving the 3dimensional look on this.  The snowflakes are also from the dollar store, I believe there were 6 sparkly snowflakes in each pack.

Next I created an "oh so cute" bunting to festify a canvas print from our wedding.


And then ...


I think I'm pretty close on the rest of the mantel.  I'll be sure to post a big to-do when the timer in my head goes off - DING - it's ready!

We now return to your regularly scheduled programming - We Wreath You a Merry Christmas - stay tuned for tomorrow's post.

Linking up:
Related Posts Plugin for WordPress, Blogger...